It’s possible to have a great experience at Rocky Mountain National Park in Colorado within a short amount of time.
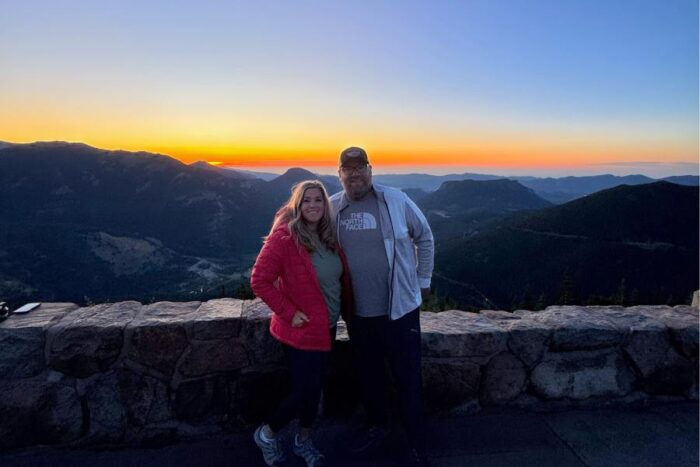
My husband and I had a United Airlines voucher that was expiring within a very short window. We decided to fly to Denver, Colorado, for a 2-day, 1-night visit because those were our only available dates for the voucher.
I know it’s ideal to have more days, but I also want to let you know it’s still very possible to cram in a lot at Rocky Mountain National Park within a relatively short amount of time.
Thankfully, we had a direct flight to and from Denver, and the time change going from EST to MT in the morning worked to our advantage.
I’m sharing more about how to make the most of your visit to Rocky Mountain National Park in a short amount of time.
This article contains affiliate links.
How Far is Estes Park/ Rocky Mountain National Park from the Denver International Airport?
It can take between 1.5+ – 2 hours to reach Estes Park, the town next to Rocky Mountain National Park, from Denver International Airport. We opted for the route without tolls that was closer to 2 hours.
We rented our vehicle from Budget at the airport. You’ll need to take a 10+ minute shuttle to the rental car area when you factor in your vehicle return time.
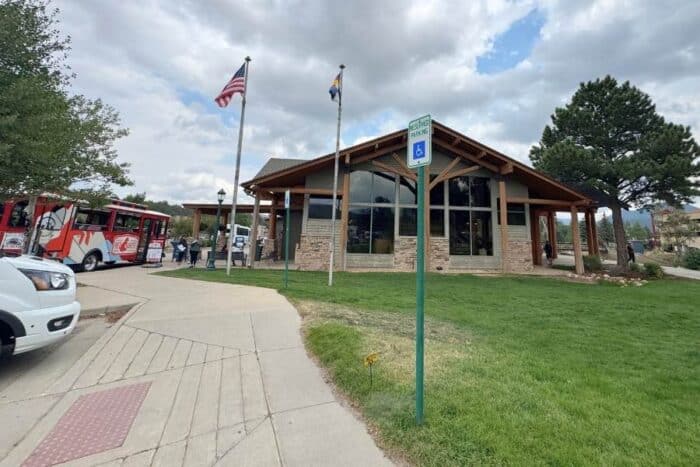
Stop By the Estes Park Visitor Center
500 Big Thompson Ave, Estes Park, CO
This was one of the best things we did to set up our visit when we arrived in Estes Park.
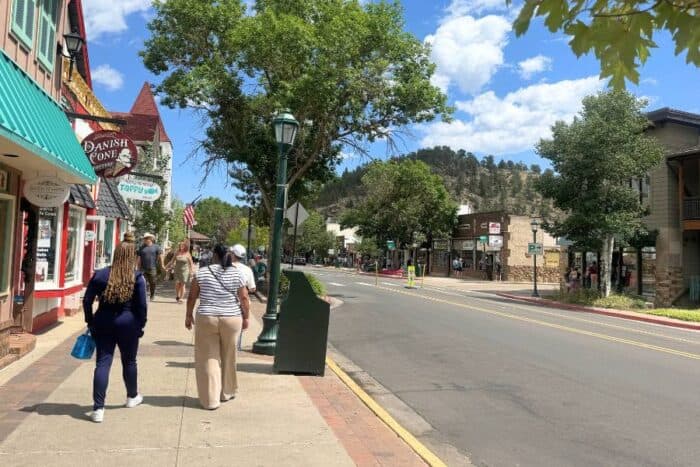
The visitor center is only 11 minutes from the national park entrance, and the downtown vibe of Estes Park reminded me of Gatlinburg, TN, in many ways.
Their staff helped us create a realistic action plan for the best use of our time in the national park, along with suggestions of additional things to do and places to eat in Estes Park.
They also have maps that you can take to use as a point of reference during your time in the park or downtown.
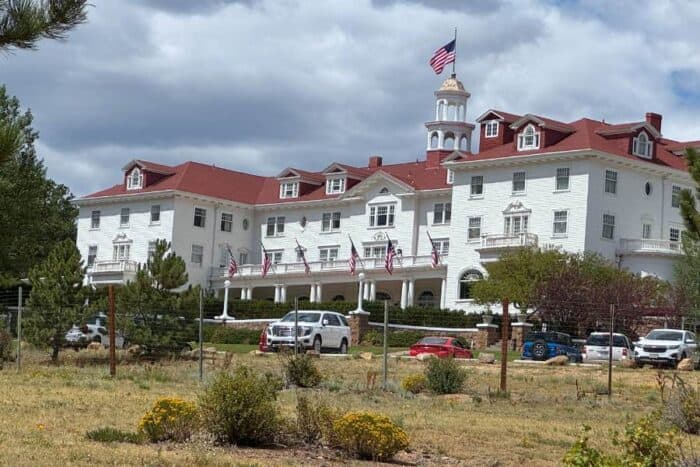
Fun fact: The Stanley Hotel, which also offers tours, is the inspiration for the Overlook Hotel in Stephen King’s 1977 novel “The Shining” and a filming location for the movie “Dumb and Dumber.”
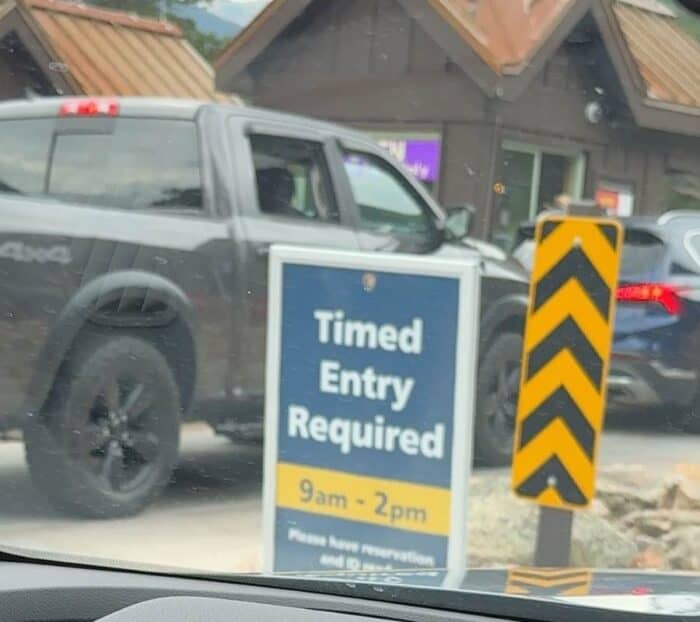
You Need a Reservation for Timed Entry at Rocky Mountain National Park
You must have a prior reservation for timed entry for Rocky Mountain National Park if you visit between 9 AM – 2 PM from late May through mid-October.
There are two types of timed entry at Rocky Mountain National Park:
- Timed Entry (doesn’t include Bear Lake Road) (9AM- 2PM)
- Timed Entry + Bear Lake Road (5AM-6PM)
Reservations are made in advance for a designated two-hour timeslot and they go quickly. I tried to make our reservation in advance as soon as our dates opened up online.
Unfortunately, the reservations went immediately. There is a $2 fee, and you can find the timed entry release dates/times here.
There’s no need to panic if you don’t secure an online reservation, the recreation.gov app, or via phone call at (877)444-6777.
You can still visit the main park after 2 PM and Bear Lake Road after 6 PM. That’s what we did, and we still saw plenty of the park.
Entry Fee to Rocky Mountain National Park
We opted for the 7-day entry fee because it was only a little more than a one-day pass. If you plan on visiting several national parks, the annual pass is the best value.
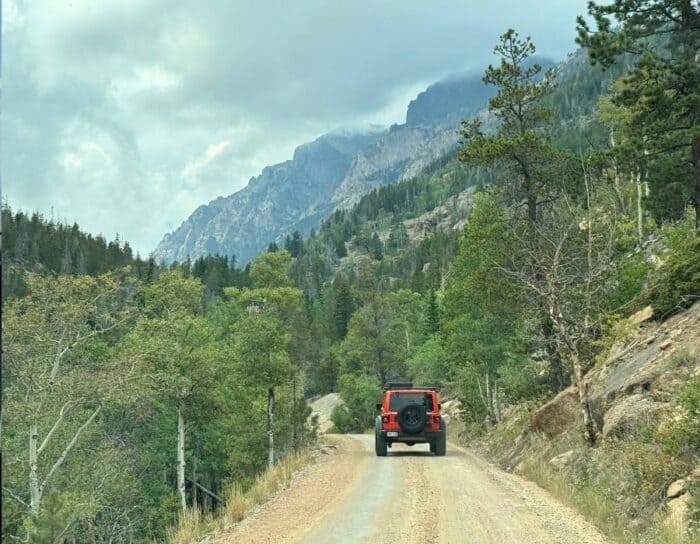
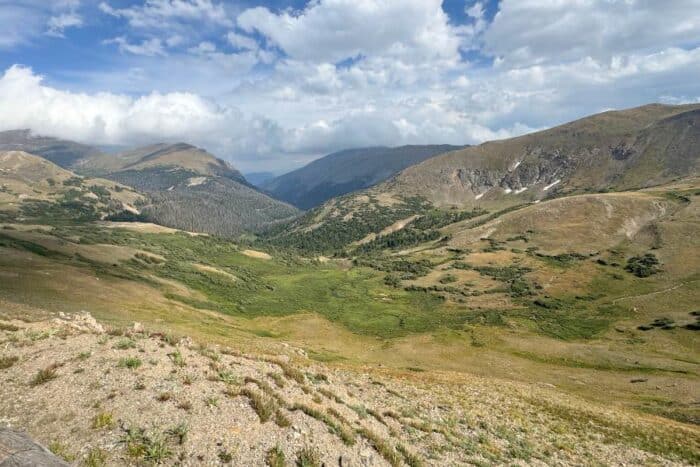
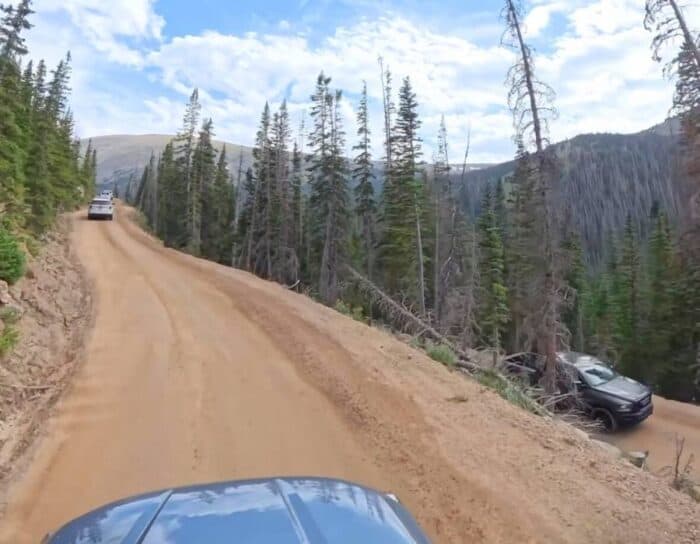
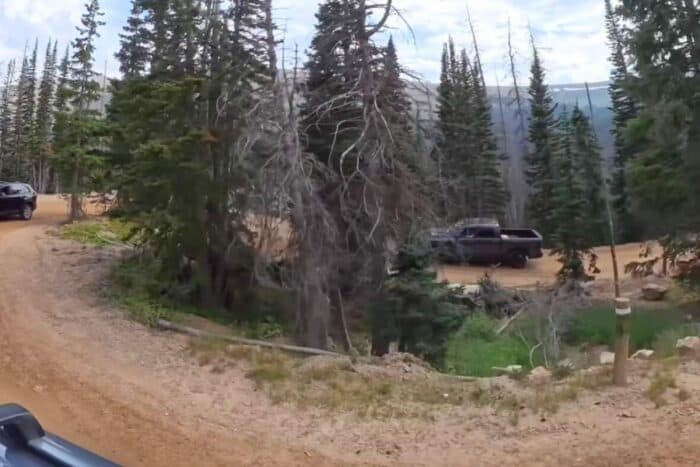
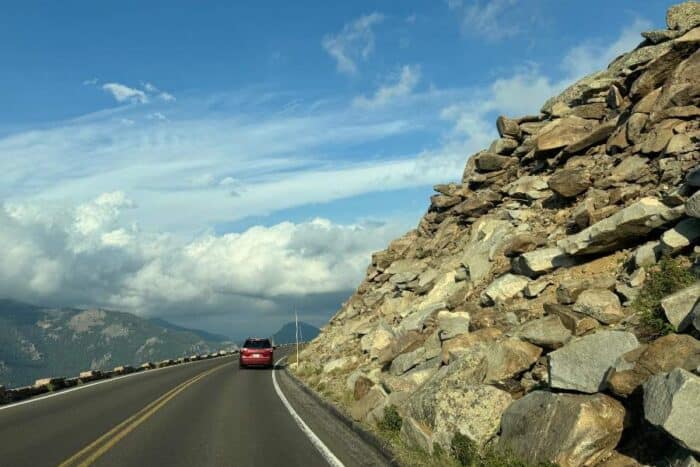
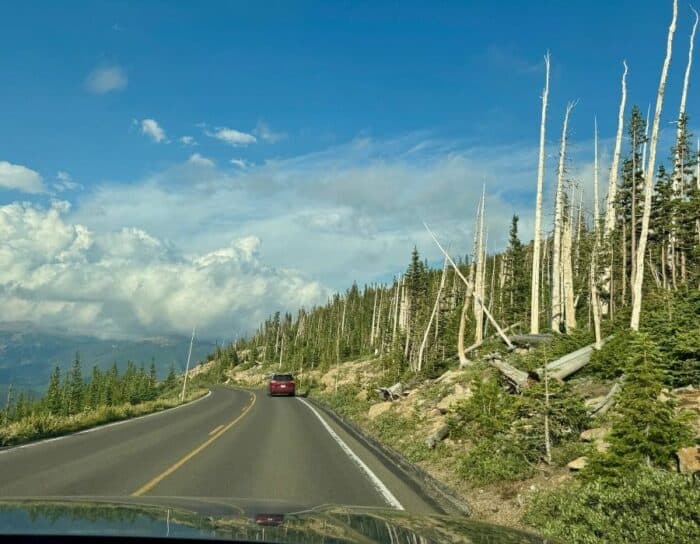
Take a Scenic Drive on Old Fall River Road
I can’t say enough great things about this gorgeous scenic drive on Old Fall River Road, and it helped set the tone for our visit.
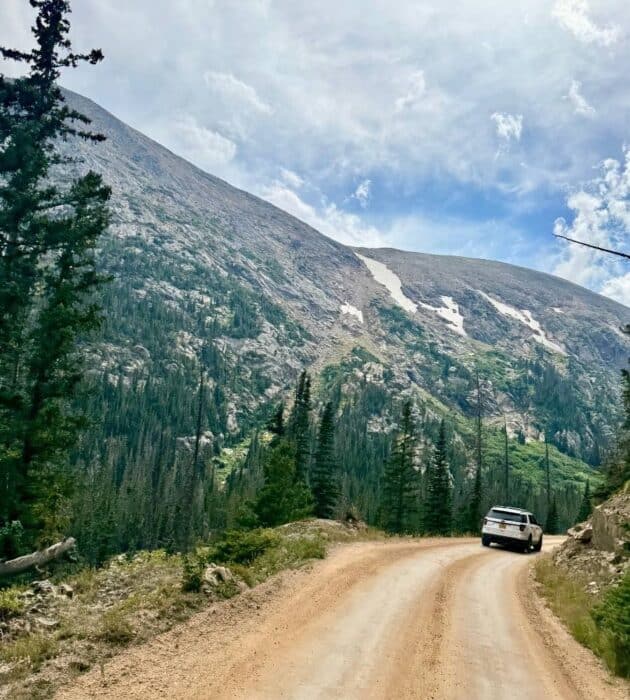
It was the perfect introduction to the wonder and beauty of Rocky Mountain National Park.
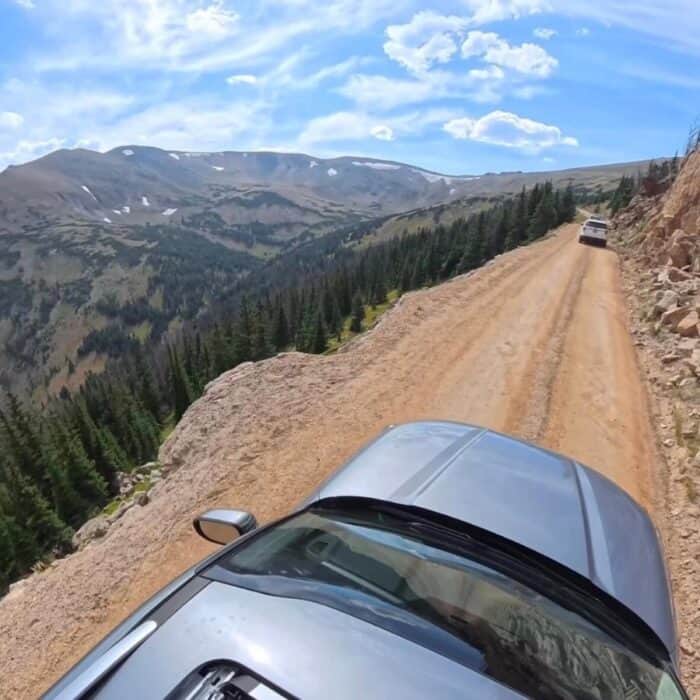
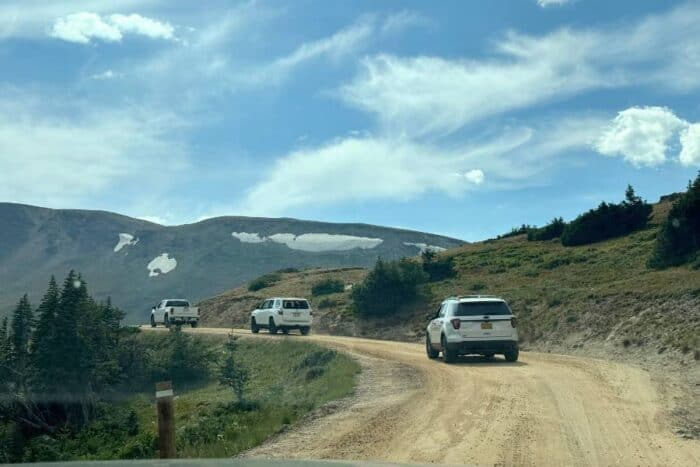
The one-way, 9.4-mile gravel road has incredible views at every turn. Speaking of turns, you’ll encounter multiple switchbacks along the way.
You’ll start at an elevation of 8,638 feet and experience an elevation change of 3,100+ feet as you wind around the steep slope of Mount Chapin’s south face.
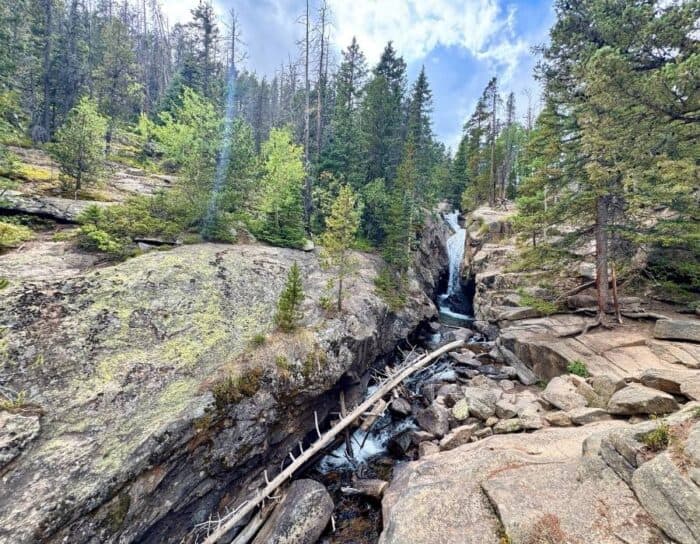
Stop for a scenic waterfall along the way. You’ll approach a parking area with a few parking spots towards the bottom of the waterfall.
There wasn’t room for us to stop, but there was plenty of room around the next turn with a larger parking area.
We had a short hike down the stairs to the best viewing area of the Chasm Falls.

We opted to stop at the observation area instead of continuing to hike farther down the waterfall.
I also knew that we had zero time to acclimate to the elevation, and we still wanted to hike near the visitor center.
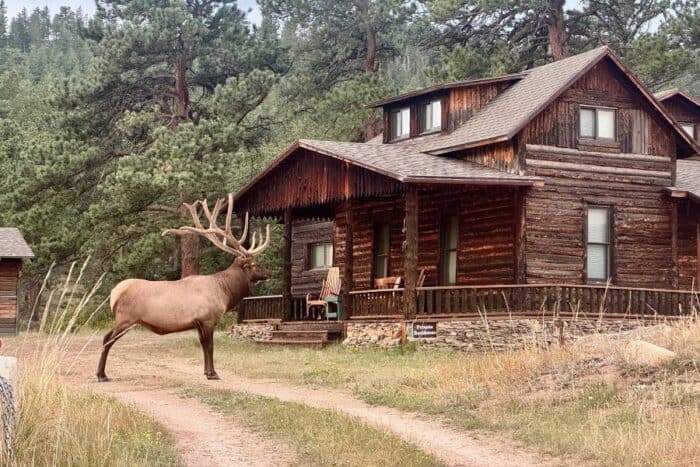
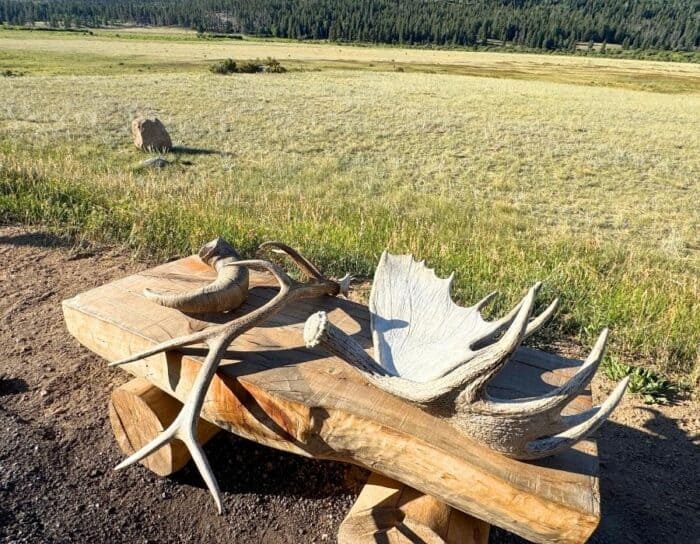
Be on the lookout for wildlife along the way.
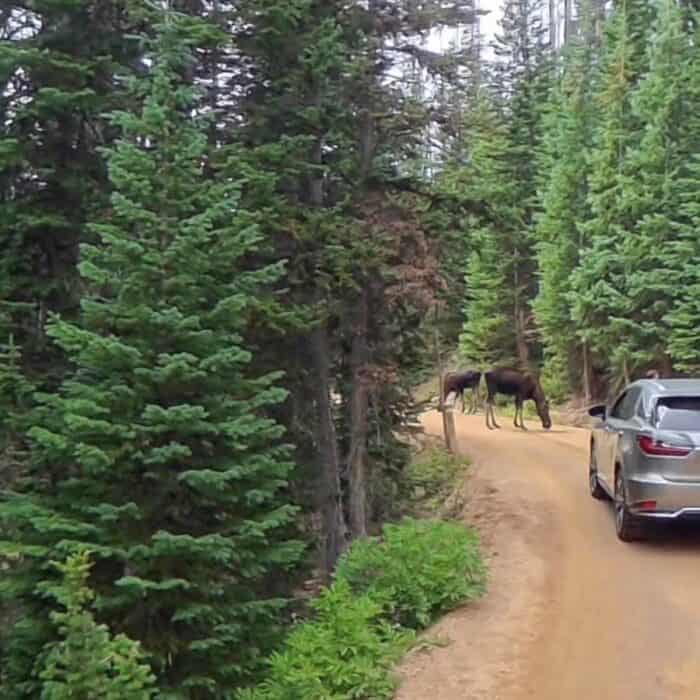
It wasn’t too long after leaving the waterfall that we had the best reason for standstill traffic. We saw two moose on this road, which was pretty incredible.
There are no guardrails on this road, so take your time and enjoy the views.
The speed limit is 15 mph, and it takes around 40 minutes to drive the road to the top, more time if you stop along the way.
Vehicles over 25 feet long and vehicles pulling trailers aren’t permitted on this road.
Old Fall River Road takes you directly to Alpine Ridge Visitor Center. The road is typically open late June/early July until around mid-October.
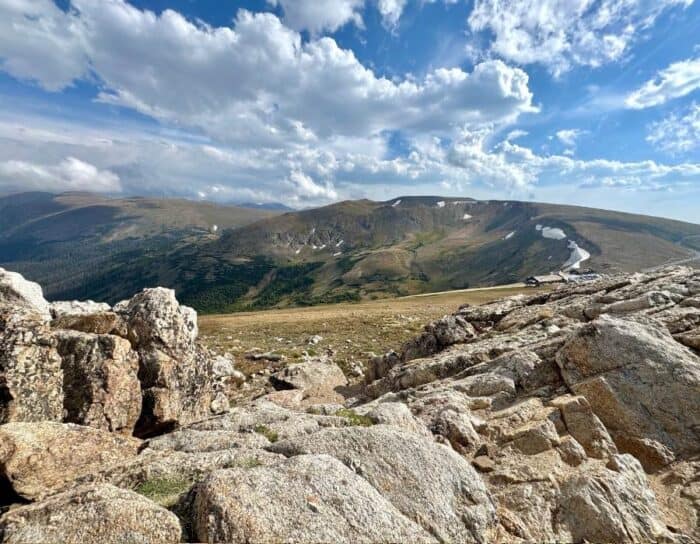
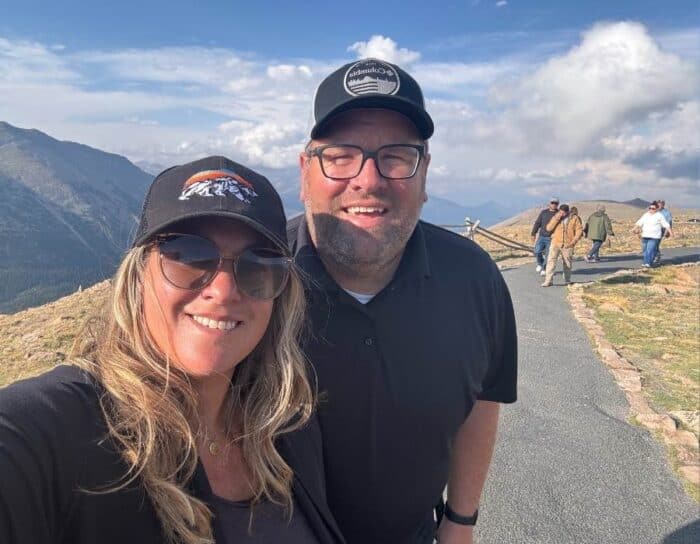
Enjoy the Views at Alpine Visitor Center
Alpine Visitor Center has the highest elevation of any visitor center in all the national parks at 11,796 feet.
You can enjoy the views from the large windows inside the visitor center or take a panoramic picture in the area adjacent to the building.
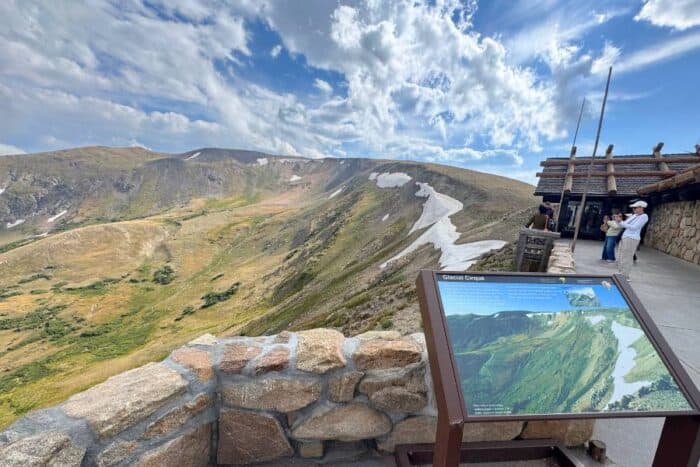
Be on the lookout for wildlife in the valley from the observation area at the visitor center.

We saw a large herd of elk on the first day and a buck on the second day.
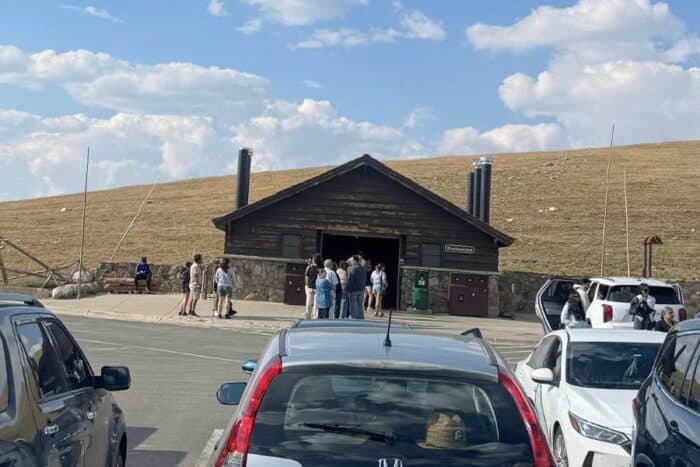
Restrooms at the visitor center are open during operating hours.
Pay attention to their hours if you prefer flushable toilets. After they close, your only option is the portable bathroom across the parking lot.
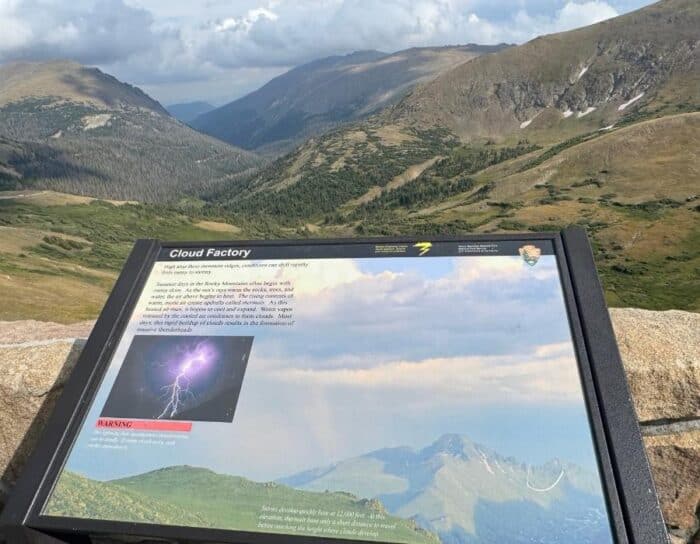
Lightning Storm Safety at Rocky Mountain National Park
Afternoon thunderstorms during the summer months are common at Rocky Mountain National Park.
Keep an eye on the weather during your visit, especially if you’re at a high elevation above the treeline.
If you’re above the treeline during a storm, it can be dangerous, especially if you can hear thunder because you’re within striking distance.
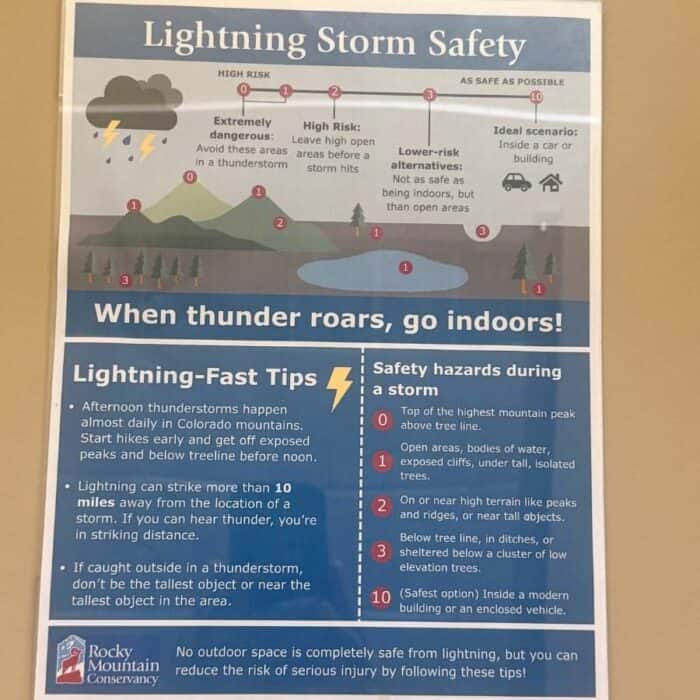
It’s suggested that you hike earlier in the morning, before noon, to avoid the risk.
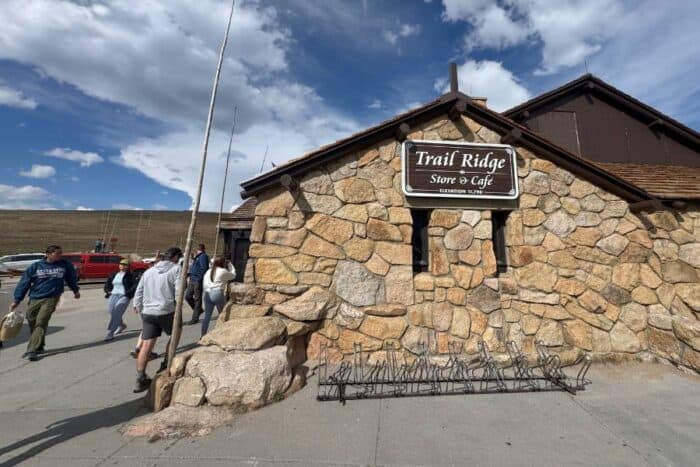
Trail Ridge Store and Cafe
The cafe next door to the visitor center offers an assortment of sandwiches, soups, snacks, and hot and cold beverage options.
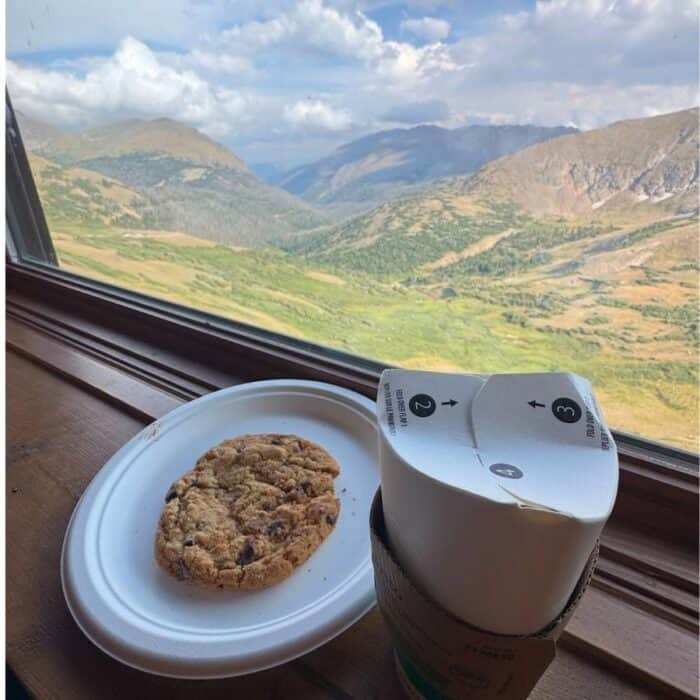
We enjoyed a locally made cookie and a coffee with a view after our climb to the summit.
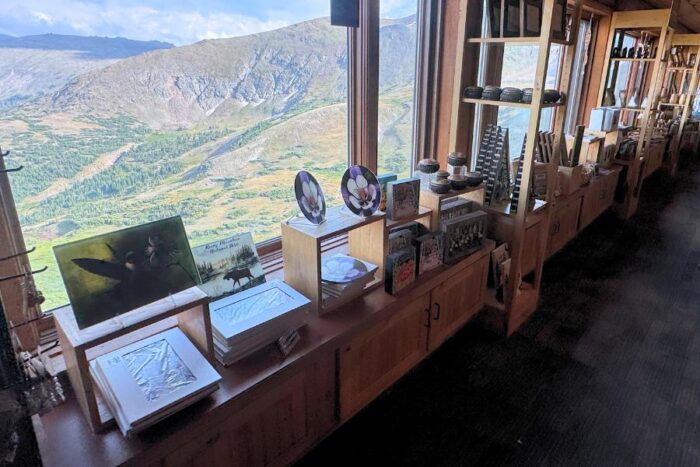
Their gift shop has a large selection of apparel, gifts, and souvenirs with views of the valley in the background.
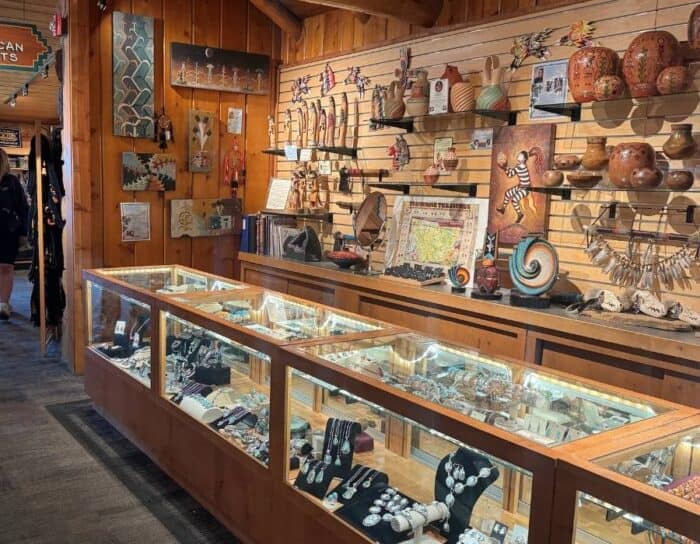
There is also a special section in the gift shop with authentic Native American Arts and Crafts.
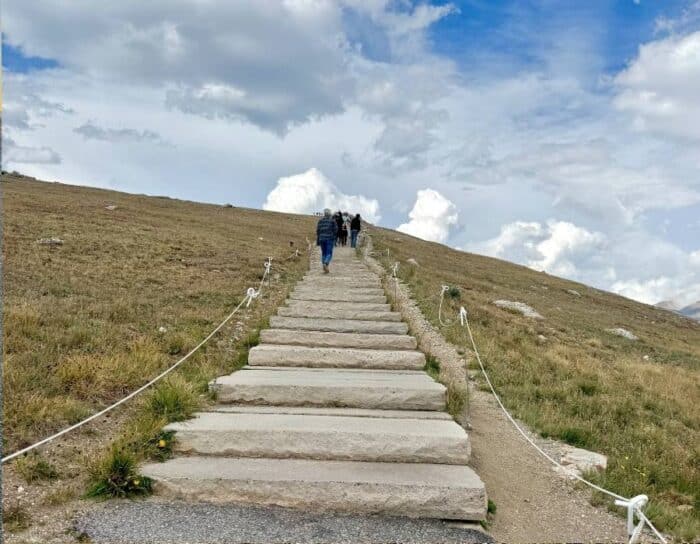
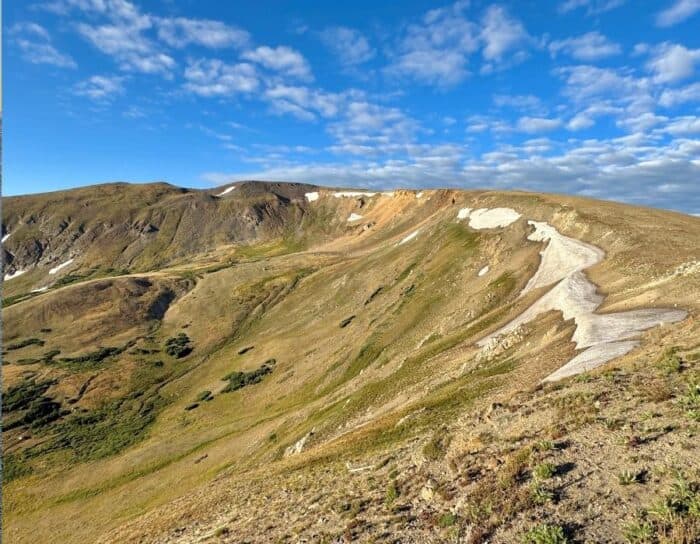
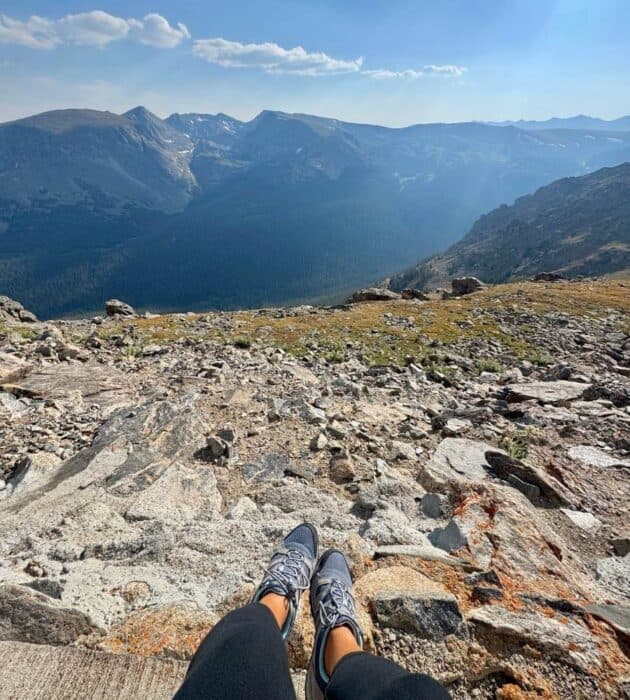
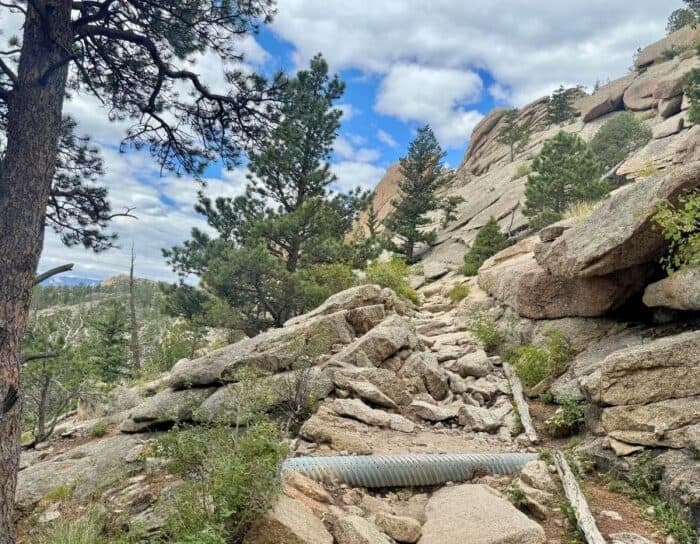
Hike to the Summit on the Alpine Ridge Trail
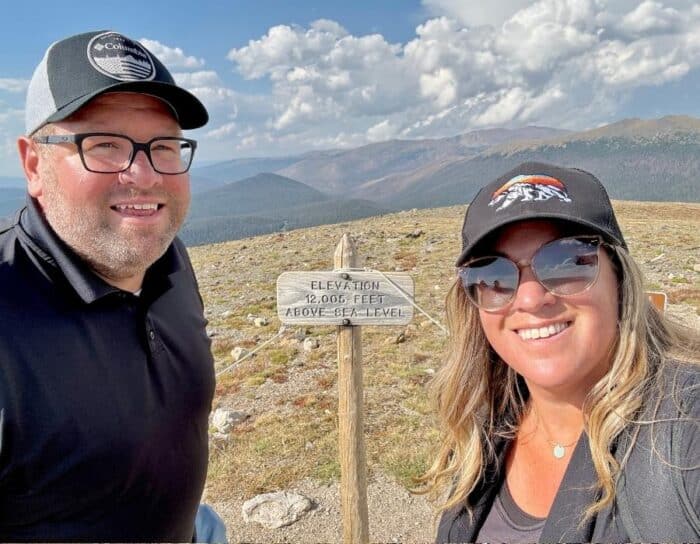
Take Alpine Ridge Trail from the visitors center to reach the summit at 12,066 feet.

We were immediately humbled as we started walking up the stairs. It doesn’t look that far to the summit, but we quickly learn why it’s called “Huffers Hill.”
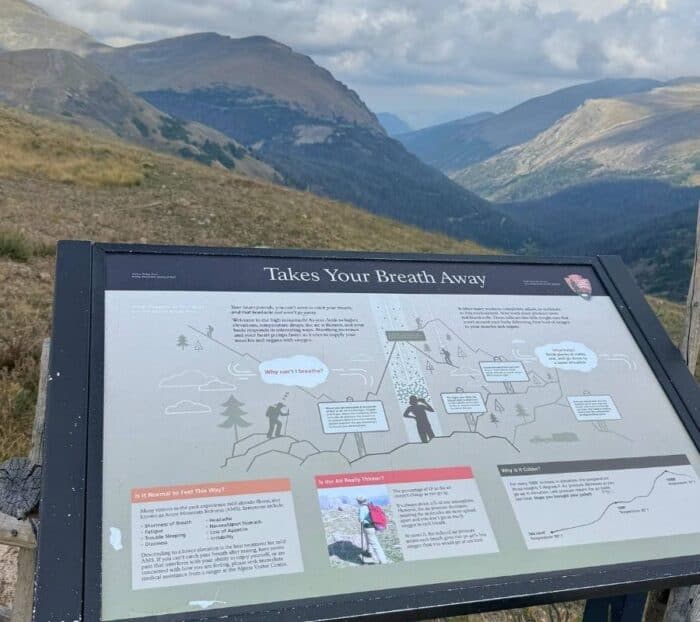
How to Prevent Altitude Sickness at Rocky Mountain National Park
Altitude sickness can occur when your body doesn’t have enough time to adjust to the new elevation and reduced oxygen.
We stopped several times to “read the plaques”/ catch our breath. We’re talking “Darth Vader” / “phone stalker” level breathing sounds on the way up.
Each breath at 12,000 feet gives you 30-40% less oxygen than at sea level.
It can take several days to acclimate to elevation, and unfortunately, we didn’t have the luxury of additional time during our visit.
Hydration is critical at high altitude. Drink a lot of water, avoid alcohol, and take ibuprofen as a preventive measure because you have less oxygen the higher the altitude you reach.
I definitely felt shortness of breath and an ache in the back of my head as we ascended higher towards the summit. It got better when we reduced our elevation back down to the visitor center again.
The temporary pain at The Summit was worth it for the views.
Symptoms of altitude sickness are: headaches, shortness of breath, dizziness, insomnia, fatigue, vomiting, loss of appetite, and irritability, which my husband used as a funny excuse for any time he had a grumpy “moment” the rest of the trip.
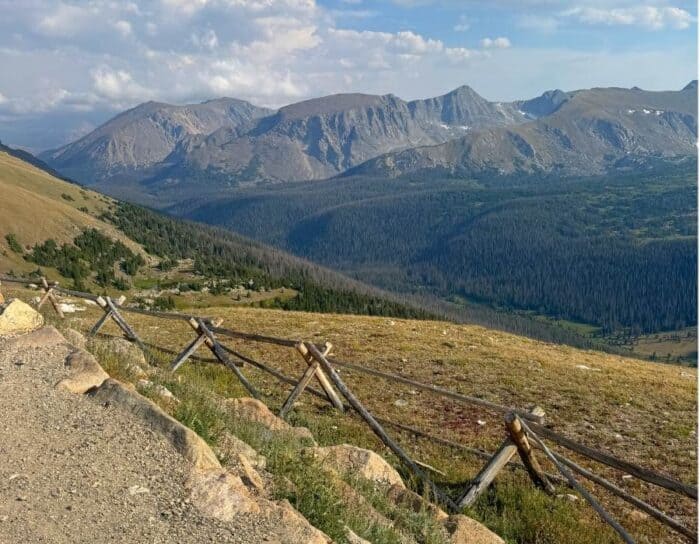
Stop at the Scenic Pulloffs Along the Way
There are plenty of areas where you can stop for a moment and enjoy the views along Trail Ridge Road.
Keep in mind that Trail Ridge Road is closed from mid-October to Memorial Day.
This drive is pretty incredible without stopping, but I’d recommend at least planning for Gorge Range Overlook and Rainbow Curve. The speed limit is an average of 30 mph along the way.
Forest Canyon Overlook has a nice paved .3 out and back trail with an elevation gain of only 19 feet if you want to stretch your legs, too.
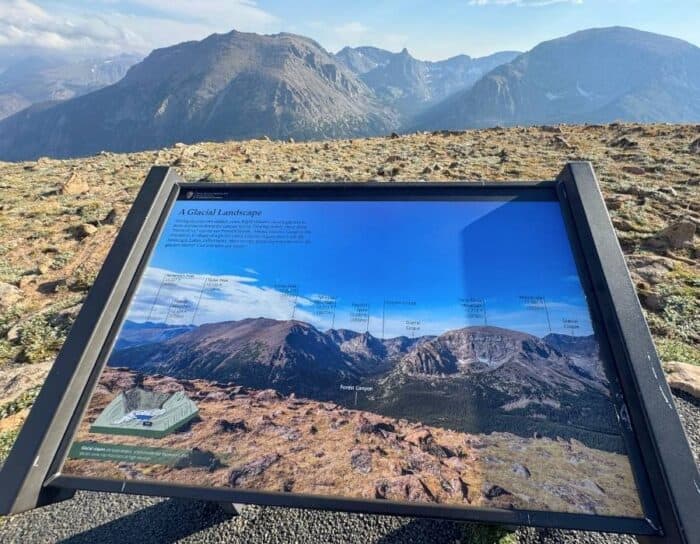
The Forest Canyon panoramic views at 11,716 feet include Hayden Gorge and Gorge Lakes.
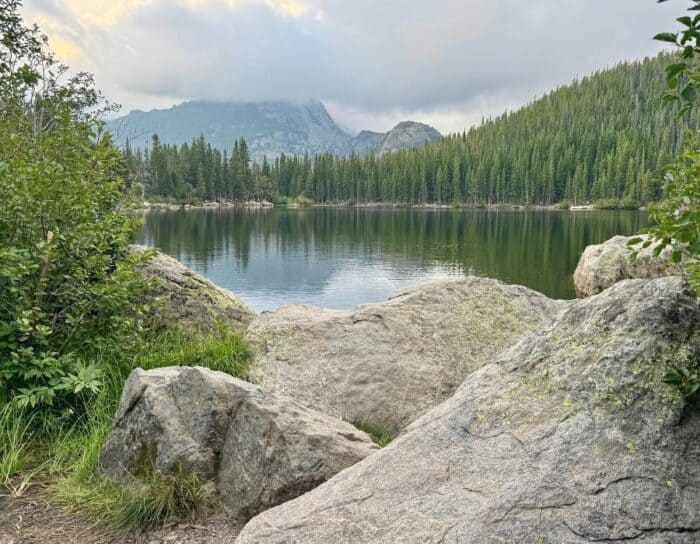
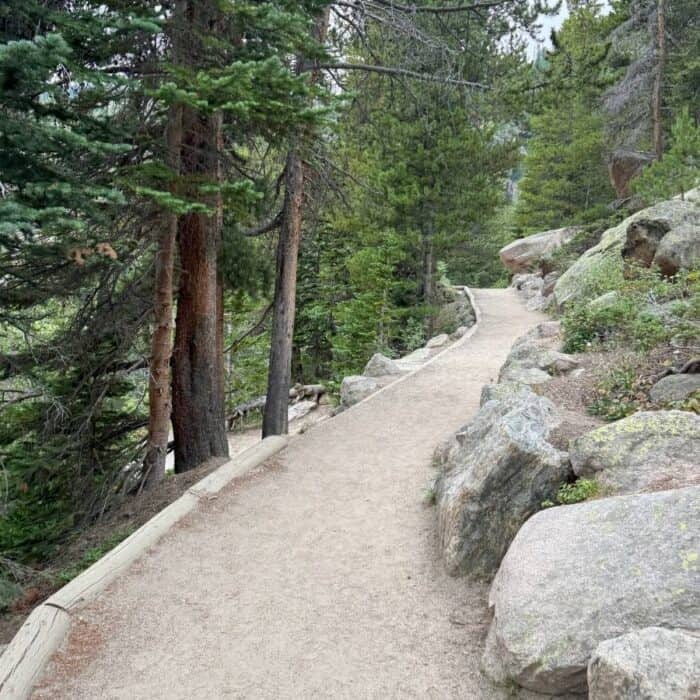
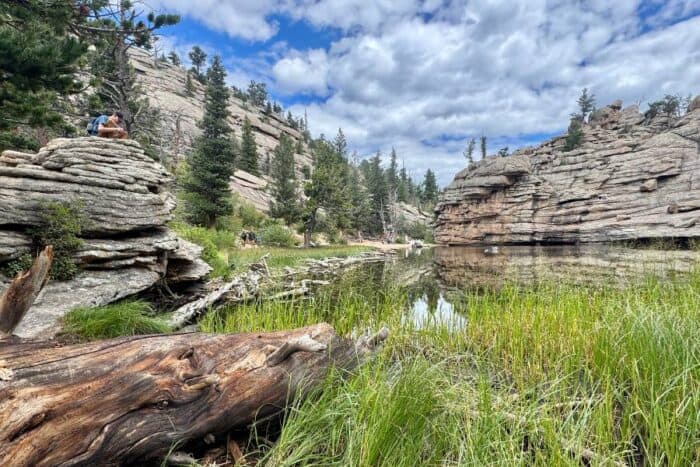
Walk Around Bear Lake
The scenic hike around Bear Lake is an easy .7 mile loop trail and an elevation gain of 49 feet with gorgeous views at every turn.
This trail is also wheelchair accessible, but could be more challenging in the areas with an 8% grade.

It’s estimated that it only takes an average of 15 minutes to complete around the lake.

Bear Lake Road has timed entry from 5am-6pm, and we visited a little after 6 and still had plenty of daylight.

This is a popular spot for its accessibility, scenic views, and Instagrammable photo ops.
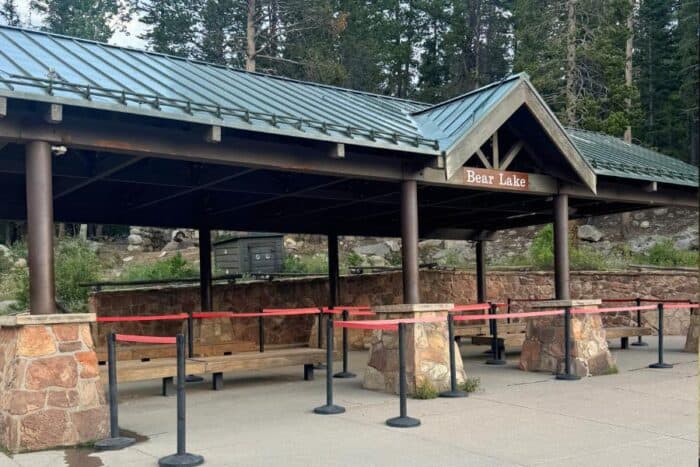
The parking lot at Bear Lake can fill up quickly, but there’s a free shuttle available through the National Park.
If you need to refill your water bottle, there’s a water station conveniently located next to the shuttle station.
Be on the lookout for wildlife along the side roads before and after the lake.
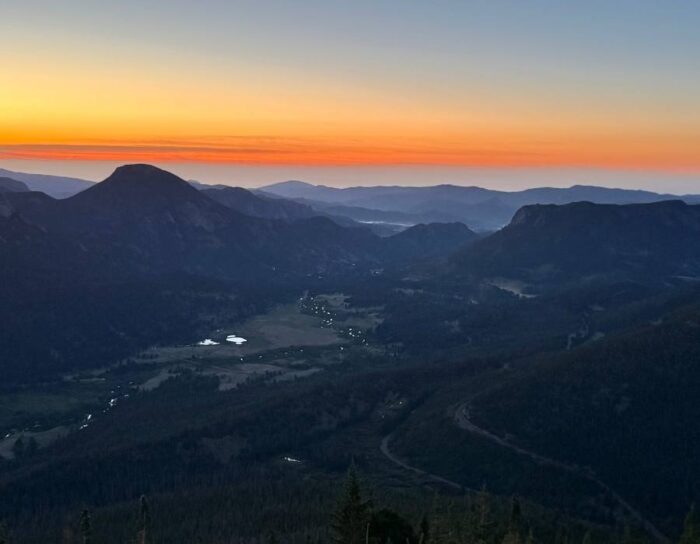
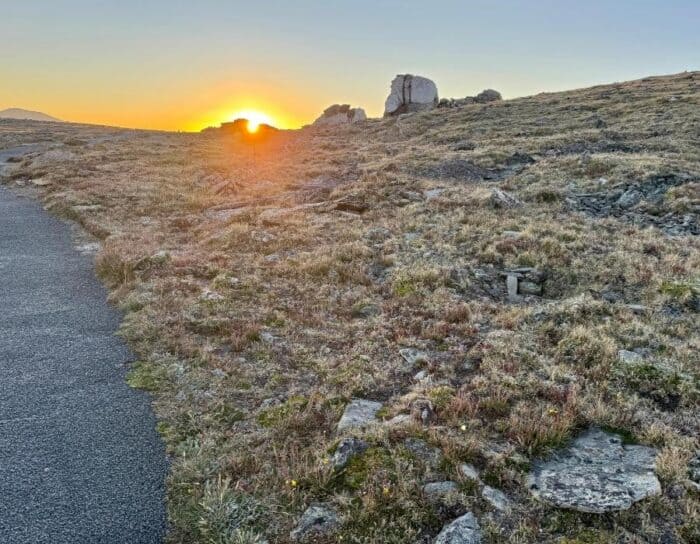
Sunrise at Rocky Mountain National Park
One of the perks of our bodies being on EST was that it was pretty easy to wake up for sunrise pictures in the park.
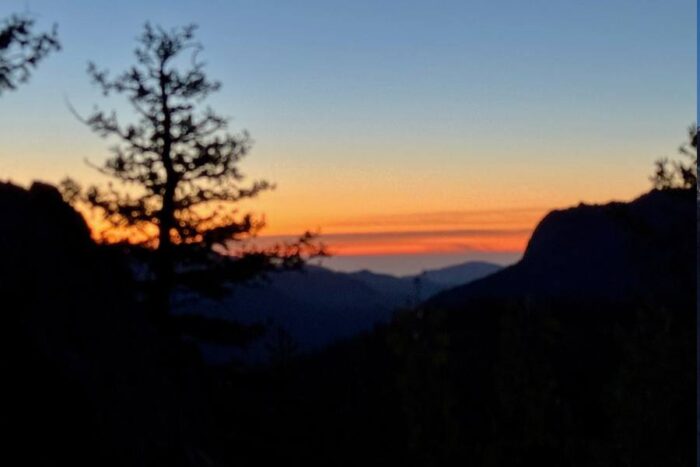
You’ll drive into the park in the dark, but you’ll be rewarded with incredible views.
Another perk of waking up early is that you don’t need a timed entry reservation to the main park entrance if you enter the park before 9am.

To capture the magic, I’d recommend allowing time to set up for twilight, 30 minutes before the sun is set to rise. You’ll also want to factor that in for your drive time.
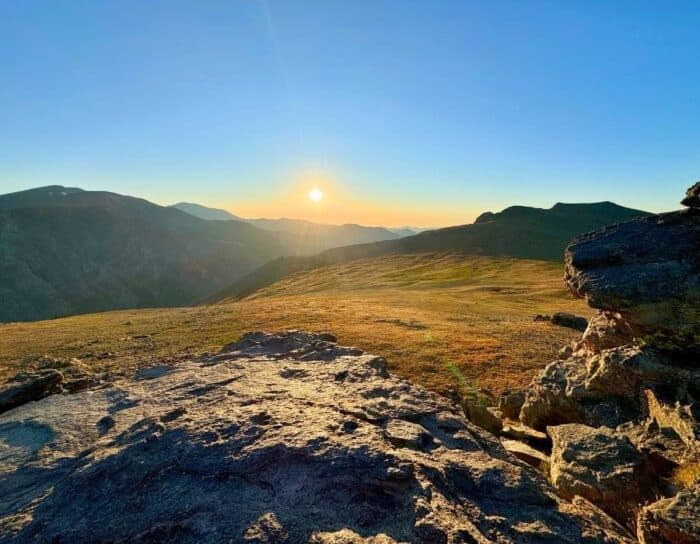
We started at Rainbow Curve, and we could have stayed there for sunrise, but I really like the shade of pastels we witnessed at Rock Cut from the Tundra Communities Trail.

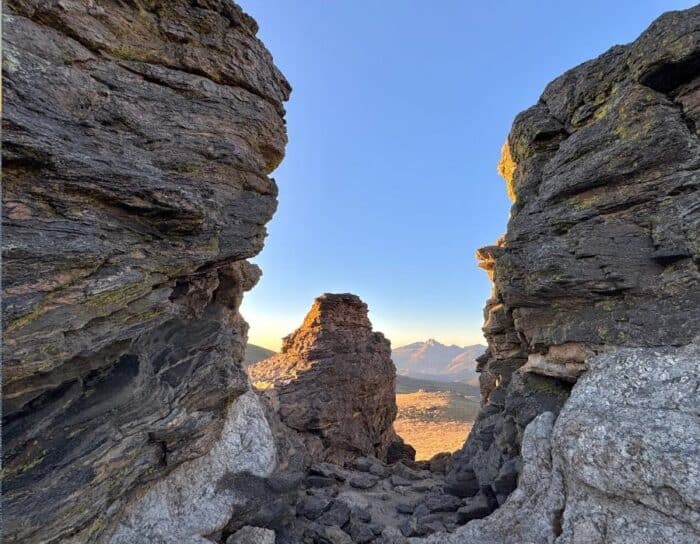
Tundra Communities Trail
The Tundra Communities trail is especially gorgeous around sunrise with unique rock formations towards the top.
The out-and-back 1.2-mile paved trail has a 176-foot elevation change.
Once again, you’ll feel the elevation change, especially if you’re still adjusting to the altitude. If you start to feel sick takee breaks and rest.

Your starting elevation is 12,110 feet above sea level, which explains why you may find it harder to breathe.
There are plenty of interesting markers along the way about the ecosystem that survives incredibly harsh conditions to help you pace yourself on the way up to an elevation of 12,286 feet.
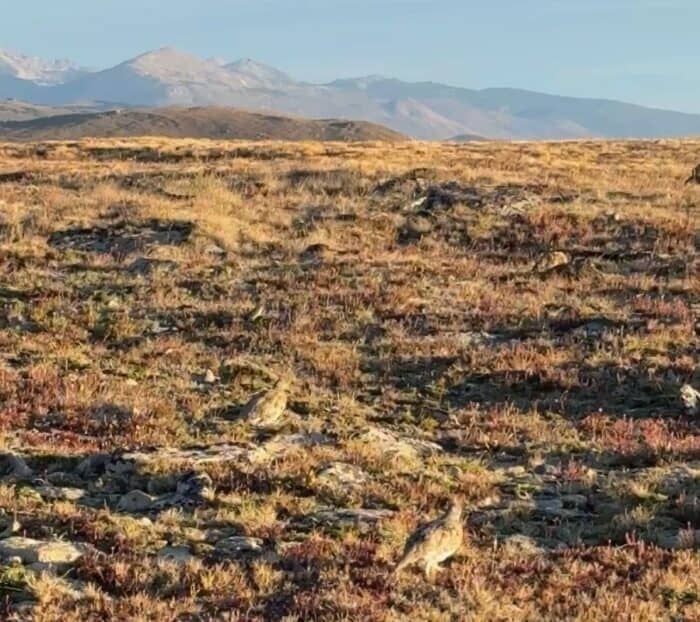
Be on the lookout for wildlife along the trail. We encountered White-tailed ptarmigans that kept coming near us while we were on the path.
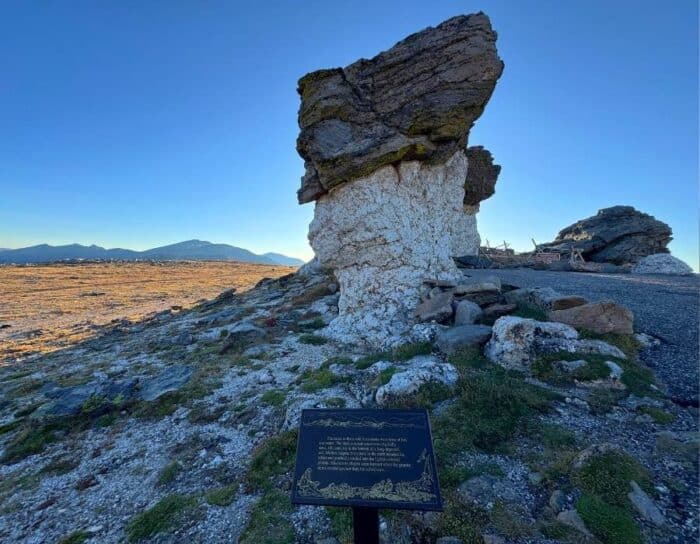
The ecosystem around the tundra is fragile, so please stay on the designated paved trail. You’ll also want to check out the section with the “Mushroom Rocks”
Sheep Lake Viewing Area
Sheep Lake is a popular area for viewing bighorn sheep in the morning. Unfortunately, we didn’t see any, but we did see a large moose with binoculars.
Speaking of binoculars, I highly recommend packing them for your time in the park.

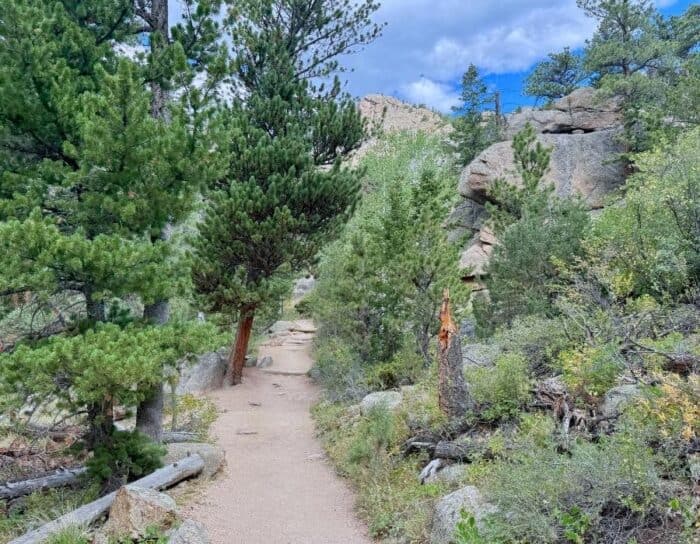
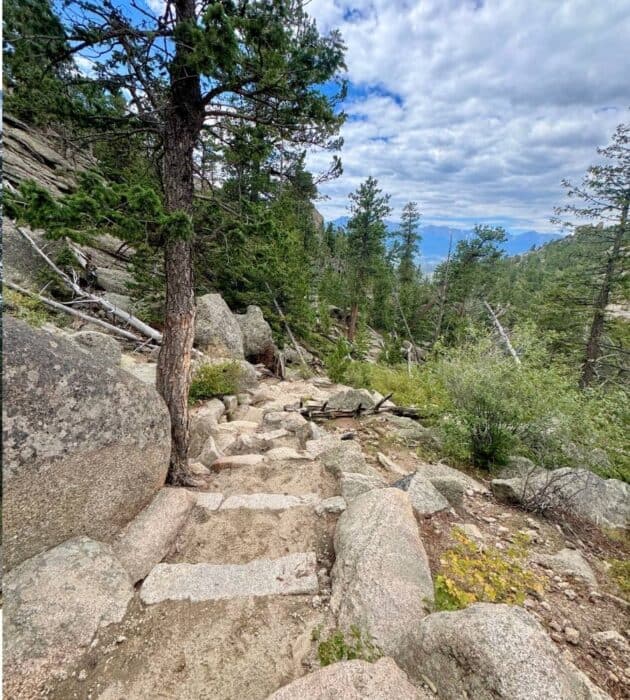
Hike to Gem Lake
Gem Lake Trail is a 3.2-mile out-and-back with almost 1000 ft of elevation gain.
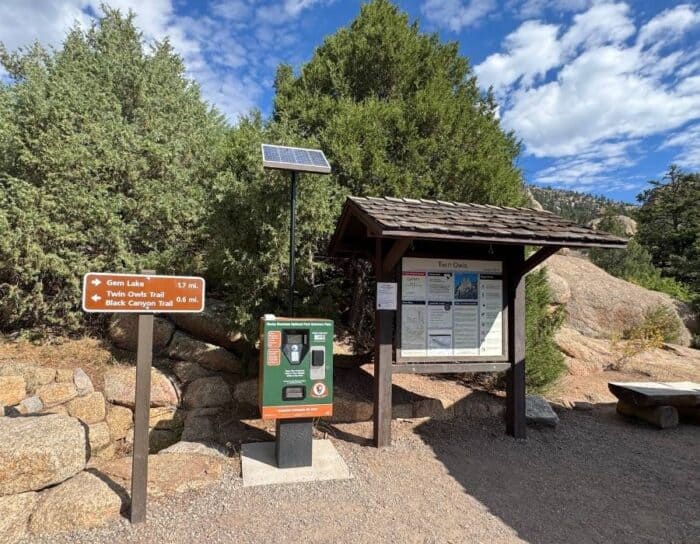
You can access the Gem Lake Trail without driving into Rocky Mountain National Park, but there are rangers onsite who will be checking for timed entry passes from 9am-2pm.
It took us a little over 2 hours to complete the hike with stops for photos and a little time at the lake.

If you don’t have great knees, be aware that this hike features numerous large stairs, particularly towards the summit.
I’d also recommend hiking poles.
I didn’t have them at the time, but I saw a lot of hikers using them on their way back down the trail.
And after hiking back down the trail, I understood why.

The landscape along the trail is scenic at every turn.

There are even great views of Estes Park from the trail.

The most intense part of the hike is the last 1/4 mile up to Gem Lake.
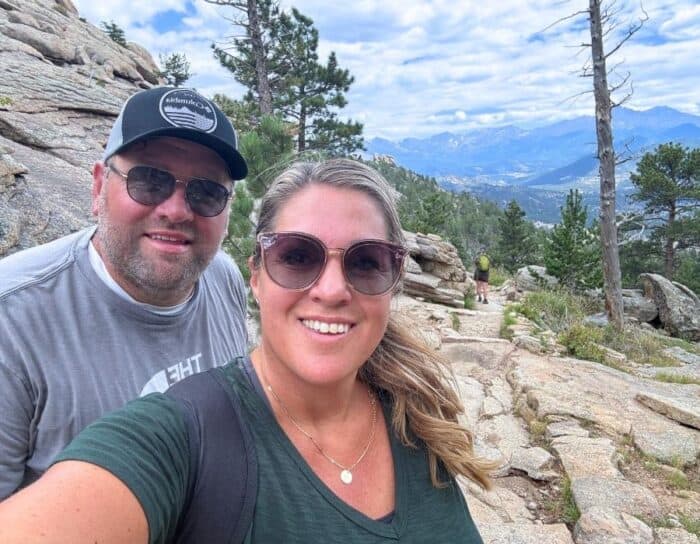
If we could do it, you can too!
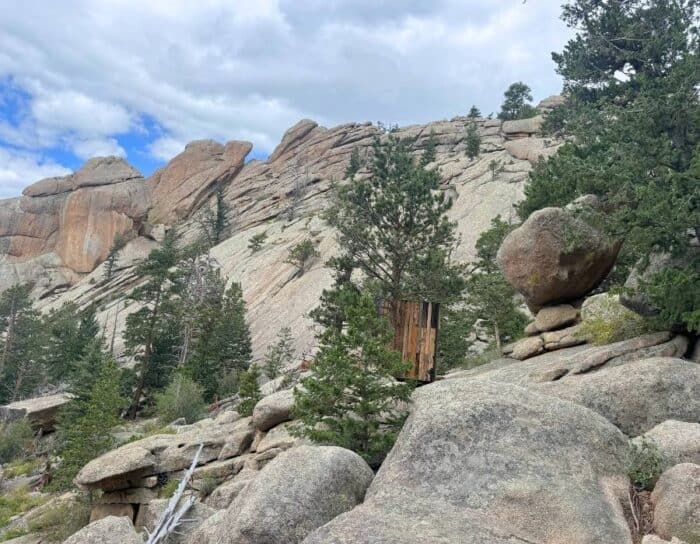
Towards the top, you may notice an outhouse in an unusual location.
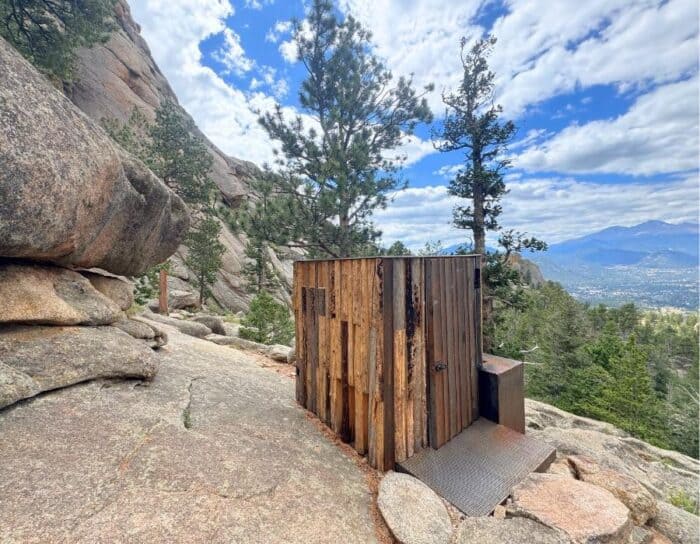
It’s worth checking out even if you don’t need to use the bathroom.
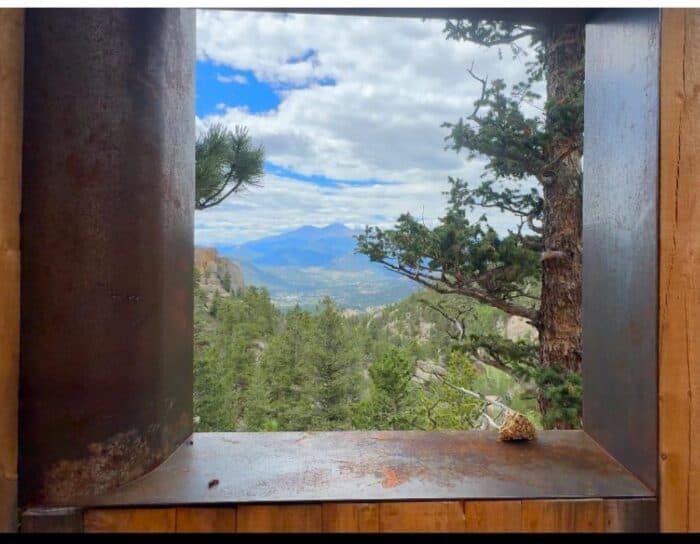
I was surprised to see this gorgeous view from an outhouse on the side of a mountain.
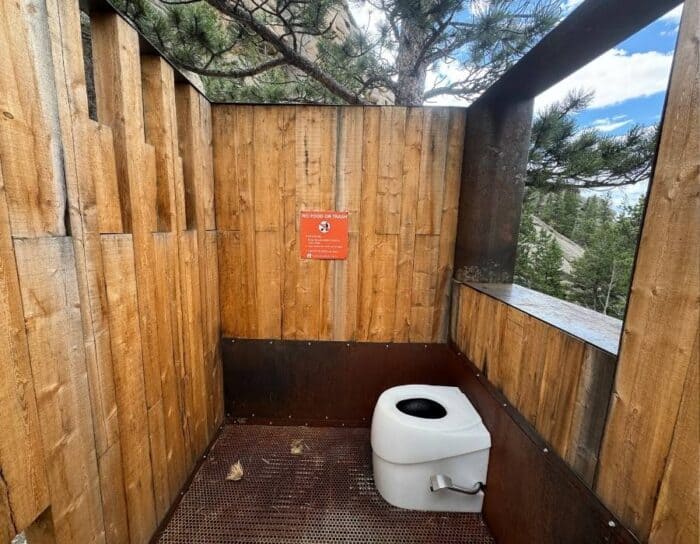
Just a heads up, this outhouse doesn’t have a ceiling or toilet paper.
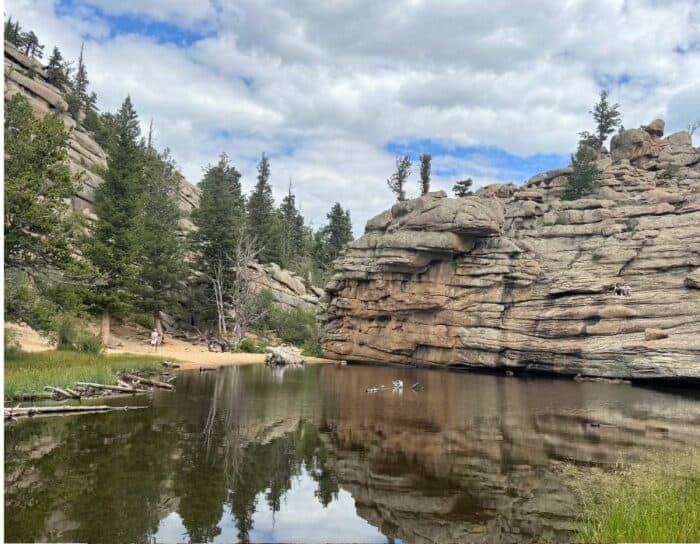
When you finally reach Gem Lake, you’ll feel like you accomplished something.
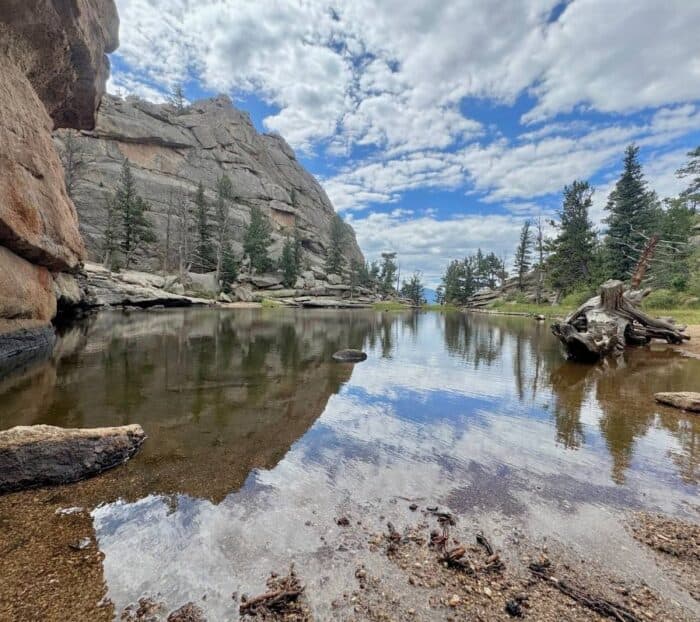
I’d encourage you to check out several vantage points around the perimeter.
If you’re feeling extra daring, you can climb up the rock overlooking the water.
Where We Stayed in Estes Park
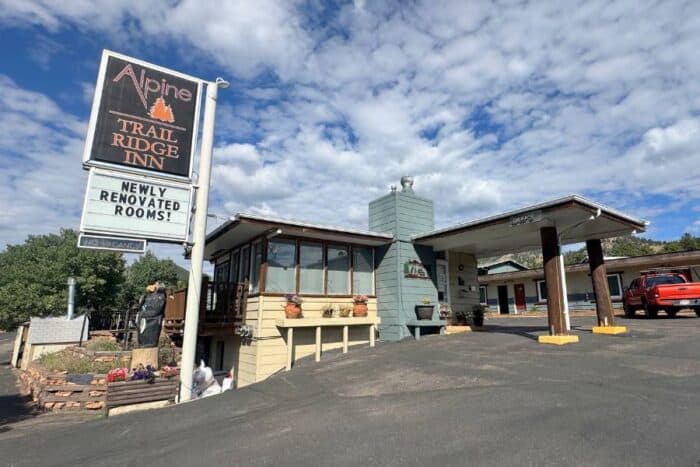
We spent one night at Alpine Trail Ridge Inn in Estes Park.
927 Moraine Avenue, Estes Park, CO
We didn’t have a lot of time for our visit, and I was looking for a hotel near the National Park so we wouldn’t waste a lot of our time driving back and forth to another city.

The inn had really high customer review scores, and it was very clean inside.

The big selling point was its location, only 2 miles from the Rocky Mountain National Park entrance.
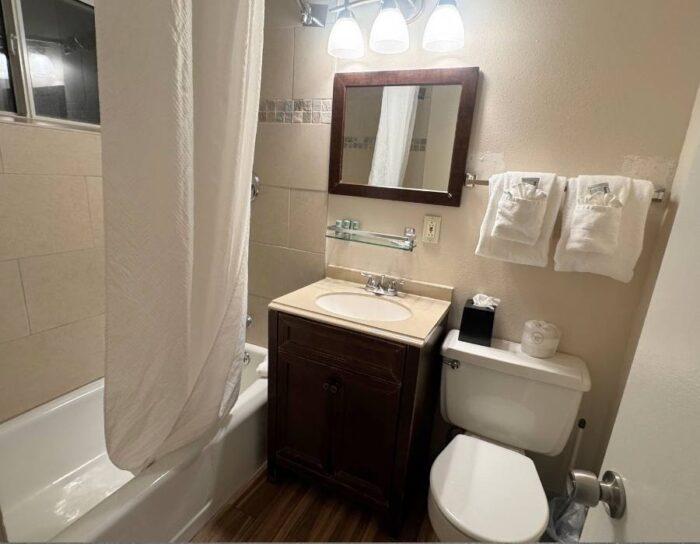
We chose a room with a King-size bed, but there are other options if you’re traveling with more people or if you want a kitchen.
We arrived at the inn after dark for late check-in and left before sunrise to take full advantage of our time in the park.
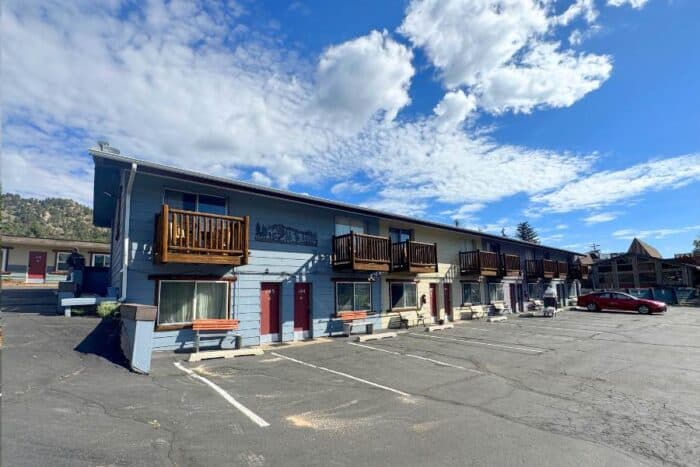
The Inn has several buildings with rooms on the first floor only or buildings with a second floor with a balcony.
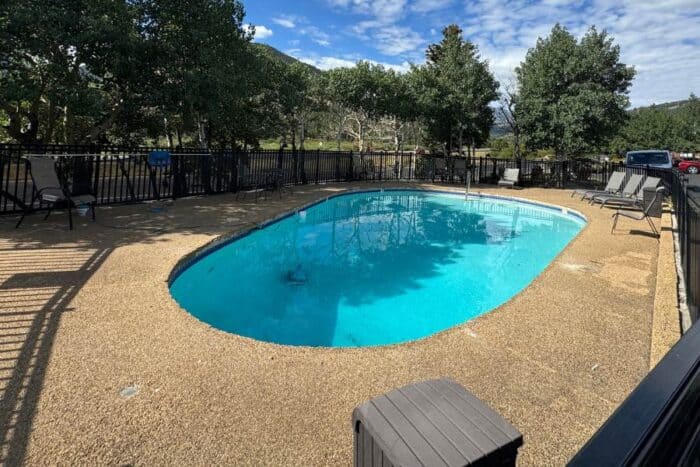
There’s a heated outdoor pool for guests to enjoy during the summer months, too.
You can find more hotels and vacation rentals in Estes Park here.
Great Places to Eat and Drink in Estes Park, CO
There’s a Safeway grocery store in Estes Park if you’re planning for a longer stay or want to stock up on drinks and snacks.
We ate our meals out because it was such a short visit, and we didn’t want to dip into our time meal planning.
And let’s be honest, I don’t like cooking, so I’m not going out of my way to cook when I’m out of town.
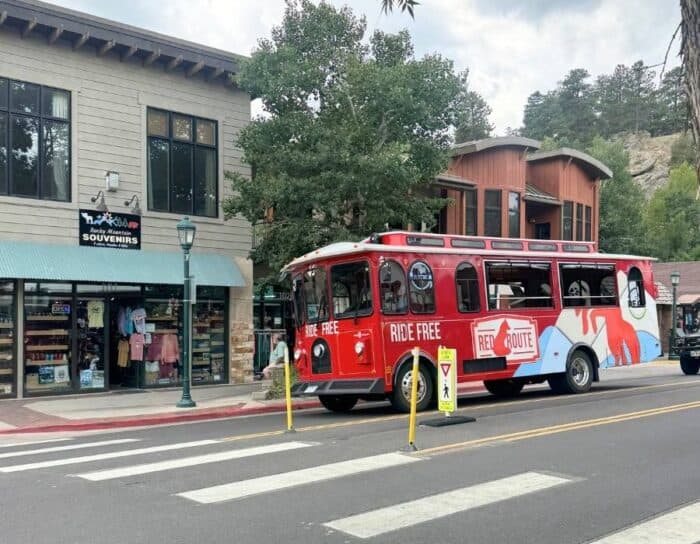
A lot of the restaurants and shops are within walking distance of each other in downtown Estes Park. There’s also a free shuttle in the summer in downtown Estes Park with multiple routes from Memorial Day weekend until mid-October.
I’m sharing more about a few places I’d recommend.
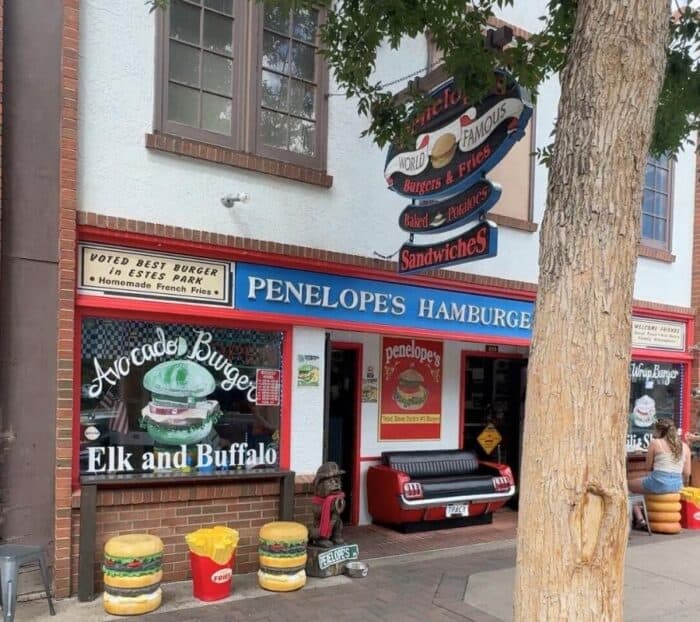
Penelope’s World Famous Burgers and Fries
229 W Elkhorn Ave, Estes Park, CO
We started with Penelope’s World Famous Burgers and Fries as our first meal in Estes Park, and it didn’t disappoint.

The restaurant is fast casual, where you order first and get your own drinks. Staff will bring your food to the table.

You can’t go wrong with their hand-cut fries as your side. We opted for the Parmesan fries and the sweet potato fries with our meals.
My husband ordered the “Big Daddy Cheeseburger” made with 1/3 pound beef, topped with Havarti cheese, grilled onions, hickory pulled pork, an onion ring, lettuce, and tomato.
I ordered the “Fire Cheeseburger” because I love spicy food. It’s made with 1/3 pound beef, smoked ghost pepper jack cheese, homemade Chipotle sauce, fresh habaneros, lettuce, tomatoes, grilled onions, and a fried jalapeño.
Their burgers are big, so have your napkins handy and come hungry!
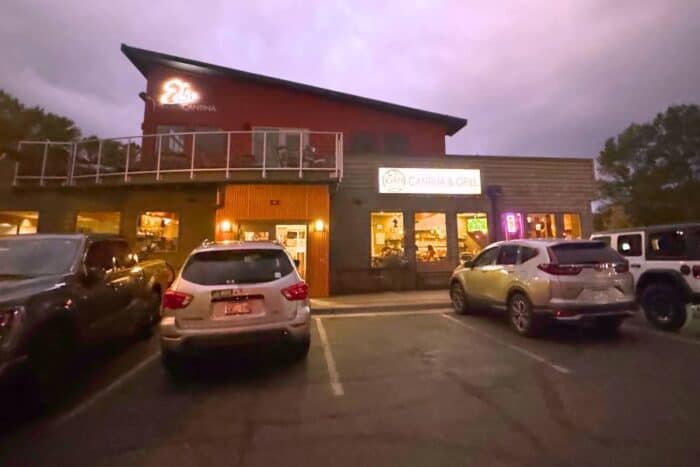
Ed’s Cantina & Grill
390 E Elkhorn Ave, Estes Park, CO
You can’t go wrong with Mexican food after a long day in the park.

We started with their housemade chips and salsa.

My husband ordered the Bison enchilada made with two ground bison & cheese, tomato~serrano sauce, habanero cream, pinto beans, rice, lettuce, and pico.

I enjoyed the carne asada made with thinly sliced & marinated sirloin, rice, 2 corn tortillas, street corn, and pinto beans
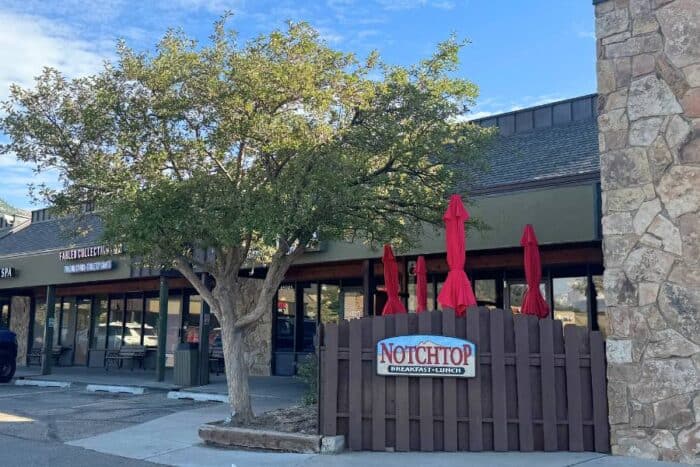
Notchtop Bakery & Cafe
459 E Wonderview Ave #5, Estes Park, CO
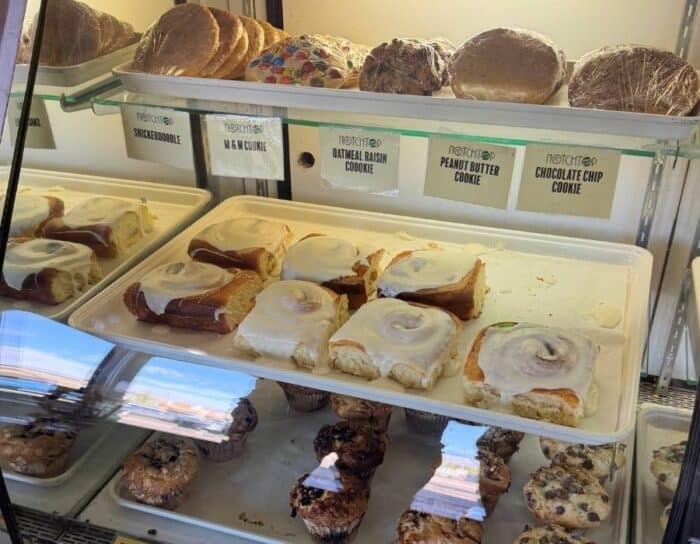
We were immediately distracted when we walked by the baked goods case at Notchtop Bakery and Cafe.

We decided to split a cinnamon roll as an appetizer with the admirable goal of boxing up the rest…but we didn’t.
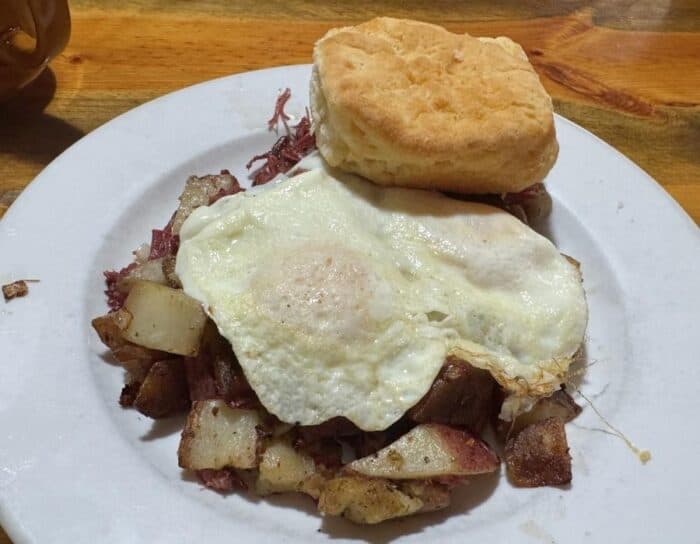
We also powered through and ordered entrees. I enjoyed the Corned Beef Hash & Eggs.
It’s made with two eggs, any style, on top of a generous serving of home-fried potatoes
mixed with diced onions and their homemade corned beef. Served with two pieces of toast or a biscuit.
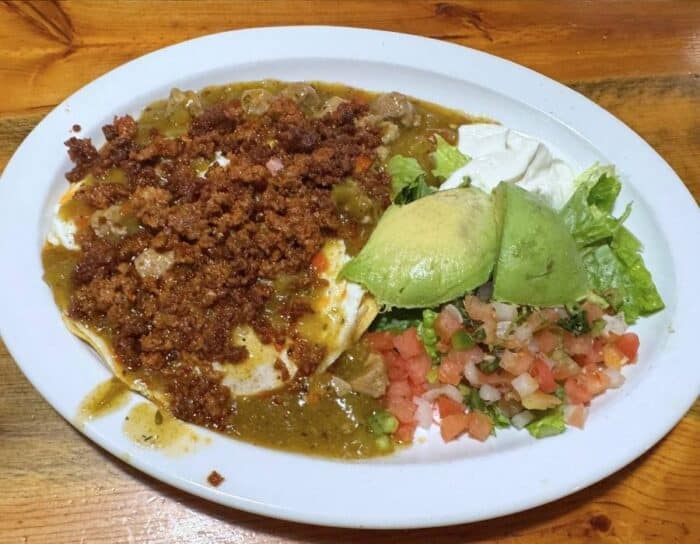
My husband enjoyed their Huevos Rancheros Mexican Breakfast with chorizo.
It’s made with two eggs, any style on top of corn tortillas, covered with homemade pork
green chili or red veggie chili. Served with black beans, pico de gallo, and sour
cream. Chorizo is an extra charge.
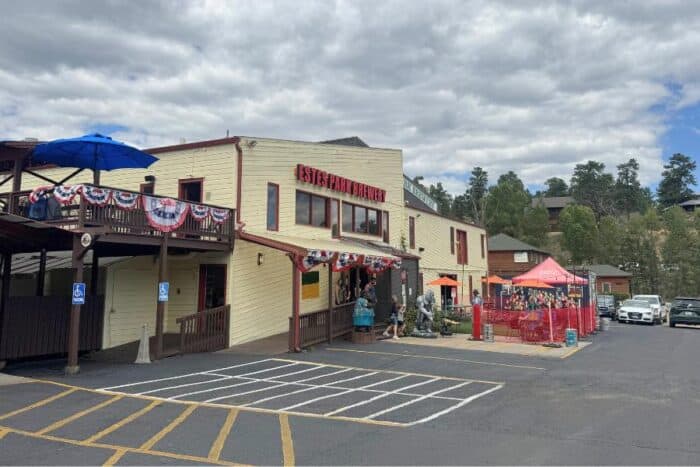
The Hive at Estes Park Brewery
470 Prospect Village Dr., Estes Park, CO
No visit to the area is complete without stopping at a brewery.

We made sure to visit The Hive at Estes Park Brewery after our hike.
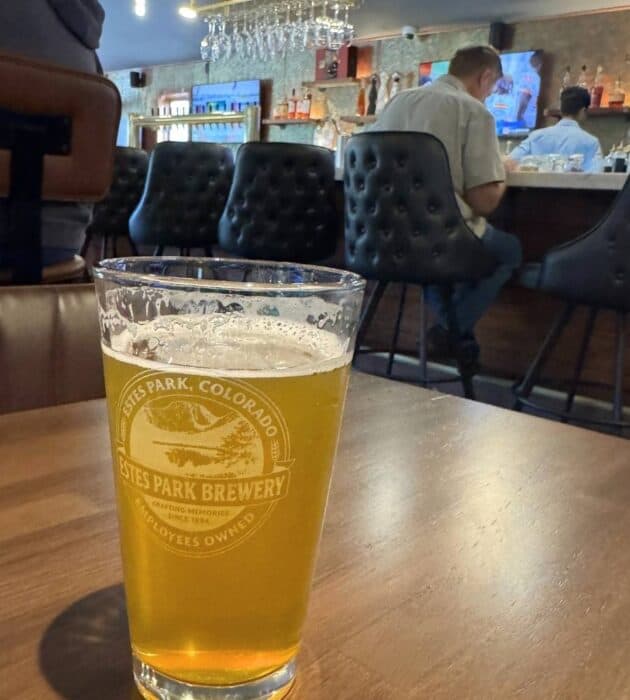
You’ll find an assortment of beers on tap, and all beers are available in bottles for carry-out.

If you’re not a fan of beer, you’ll find other options, including mocktails, cocktails, wine, and soft drinks.
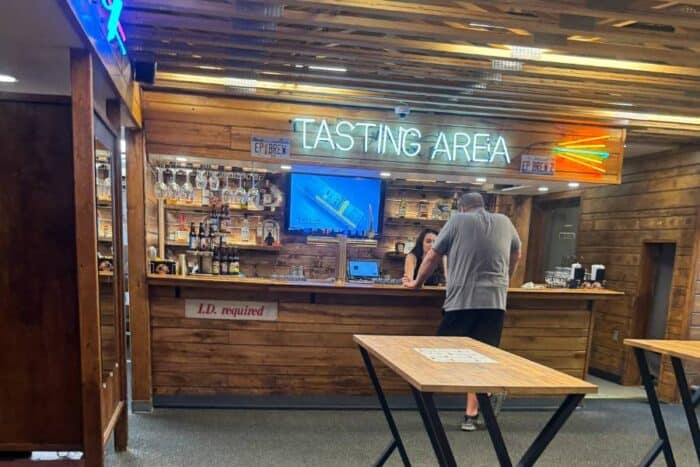
There is also a tasting room on the first floor if you’re waiting for a table.
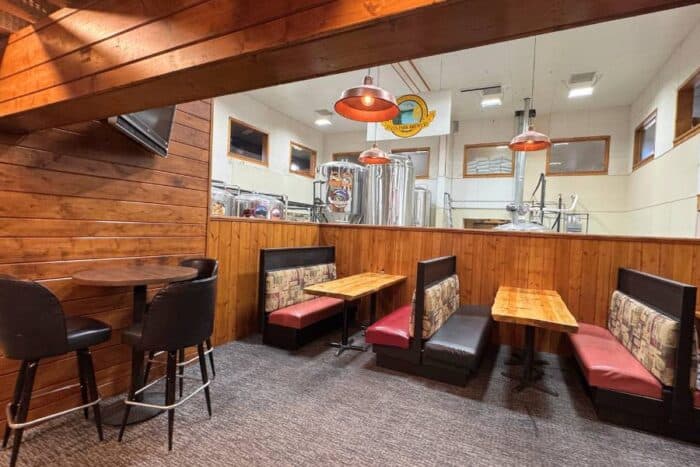
You can also see a few of the brewing tanks from the first floor, too.

The Hive’s menu has pizza, sandwiches, burgers, salads, and more.
Their classic Reuben is made with corned beef, sauerkraut, Swiss, and Thousand Island on toasted rye.

Sweet Treat at Danish Cone Factory
191 W Elkhorn Ave, Estes Park, CO
There are several options for ice cream in Estes Park, but the old-fashioned cone maker in the window at Danish Cone caught our attention.
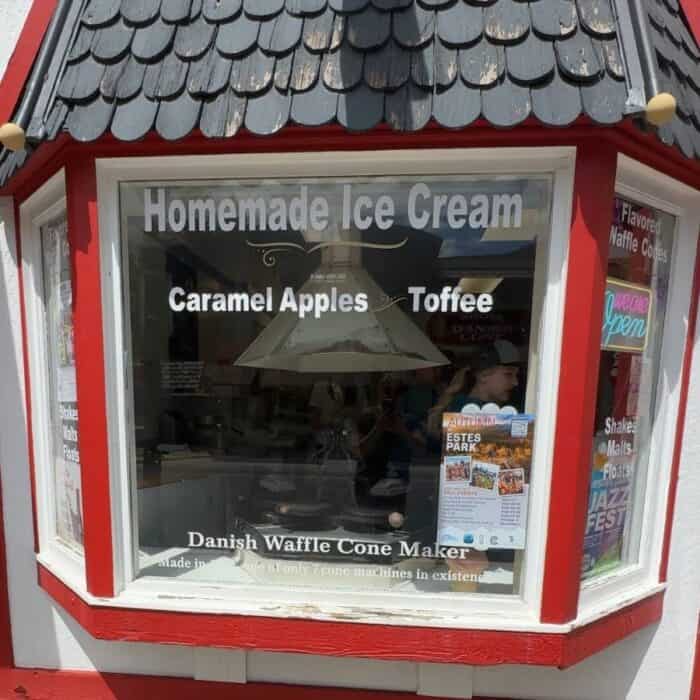
The window stated that they had homemade ice cream and their Danish Waffle Cone Maker is one of 7 cone machines in existence…so of course we had to try it…and I’m so glad that we did!